
How To Check For Unauthorized Access To Your PC/Mac
Have you ever suspected that someone has accessed your PC/Mac computer system without your permission? Unauthorized access is when a person who does not have permission to access or use a computer system gains entry in a manner that is unintended by the system owner. Gaining such illegal access is known as hacking. Here are some practical ways you can check your computer for unauthorized access and take corrective measures:
What is the risk of unauthorized access?
1. Loss of data integrity
If your kids access your device without your consent, they might open various programs and run it. Unintentional due to lack of knowledge, kids could end up corrupting a
file or programs or modifying data. Corrupted files or programs won’t open and modifying data like your work data could result in hrs of labor again.
2. Loss of confidentiality
Personal data is confidential and unauthorized access leads to loss of confidentiality. Hackers access private information and either use it for personal gain or post them on internet sites for access by the general public.
3. Financial losses
Financial losses occur when hackers gain unauthorized access to computer systems and access personal bank account details and transfer money out of accounts.
4. Blackmail
Hackers gain unauthorized access to computer systems and pick data they use to blackmail the owners, searching for ransom.
How To Check For Unauthorized Access To Your Windows Computer
1. Check Windows Logs:
The Operating System records everything that happens in the computer in a log file and it can be accessed through the Windows Logs Security section, as shown below:-
Step 1 . Press the Windows and R button simultaneously (Windows+R) OR click on the Start button and type in Run and click on the first result.
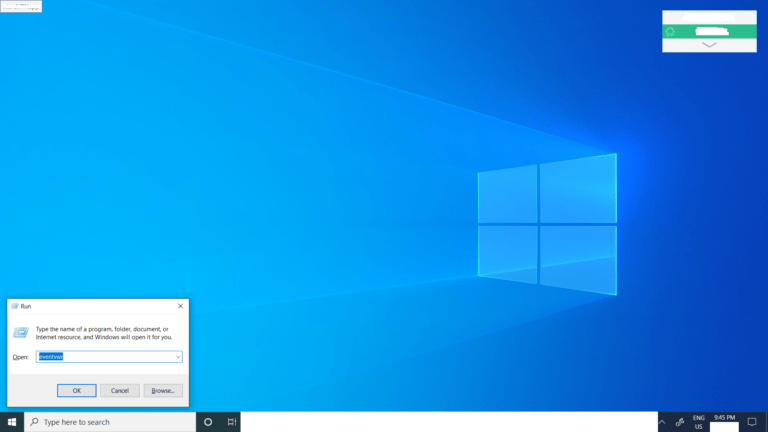
Step 2. On the Run dialog that pops up, type in eventvwr, then press Return/Click Ok.
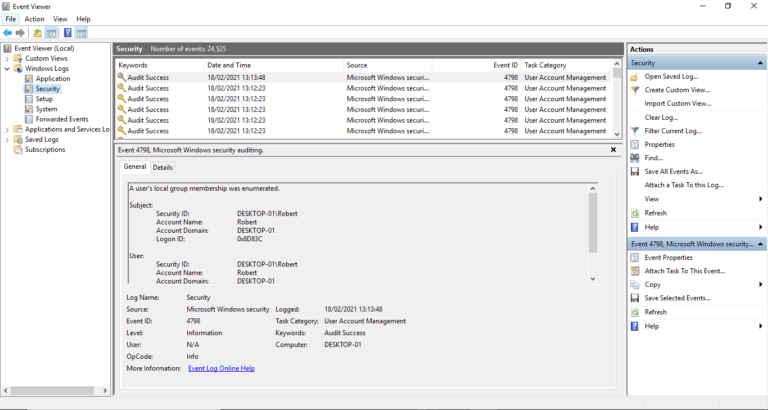
After opening the Event Viewer Logs, select > Windows Logs > Security, and you will be able to see system access details. The Security Logs will show both successful and failed login attempts. Apply filters on the security logs to see successful and attempted logins.
2. Check Connected Computers:
You can view all connected devices on your computer connected via the network interface. To achieve that, follow the steps below:
Step 1. Click on the Start button, then type This “Computer Management”.
Step 2. On the first result, click on “Computer Management”. The Computer Management screen will appear.
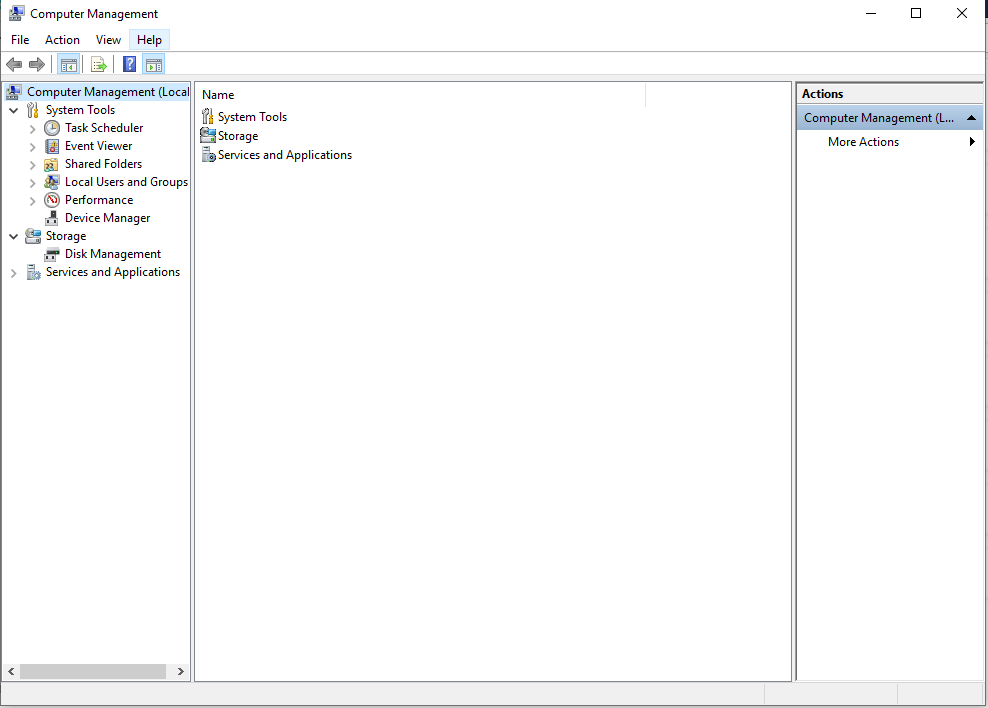
Step 3. On the Computer Management screen, click on > Shared Folders > Sessions.
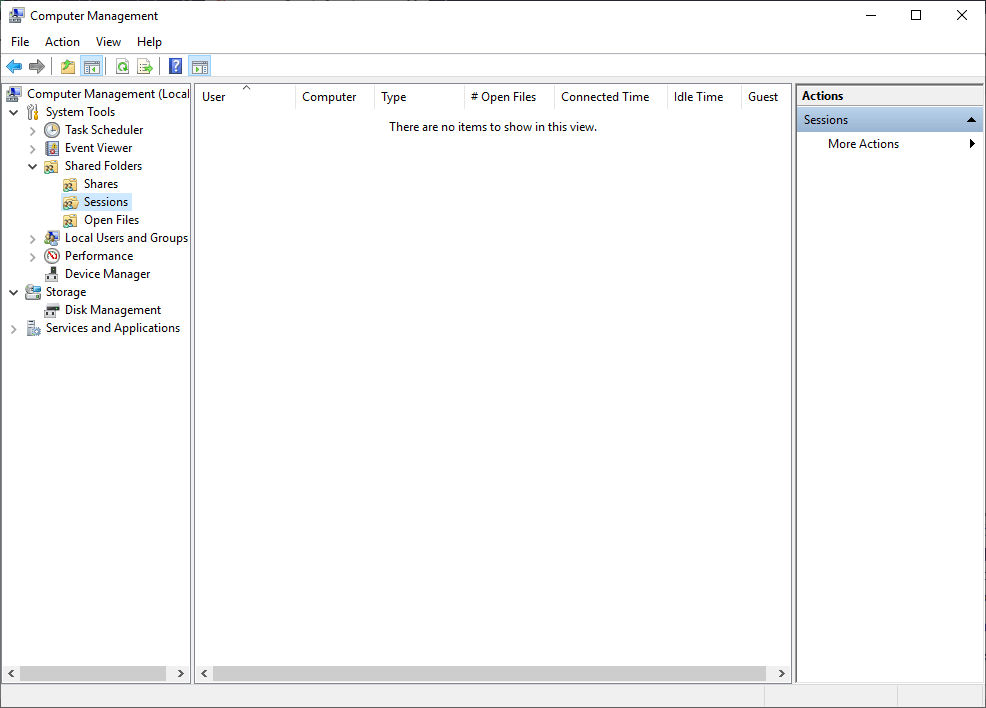
Any connected network computer will appear here with details like the computer name, user, connected time, idle time, and the number of open files. The menu below is named “Open Files” which will show Files Open details and who is accessing them. The Shares menu displays all the folders shared from your computer and the number of live connections to it.
3. Check Live Connections:
To view current connections to your computer, use the command netstat -a on the command prompt. A command-line network utility that displays incoming and outgoing network connections for Transmission Control Protocol TCP/IP. To access it, follow these steps:
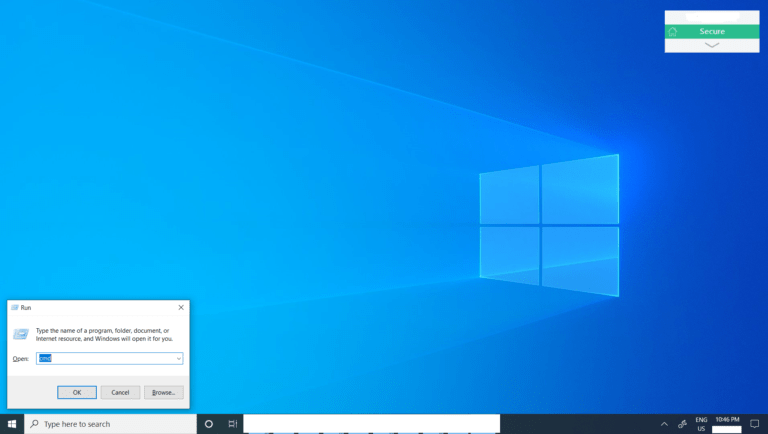
Step 1. Press the Windows key and R simultaneously (Windows+R).
Step 2. On the Run dialog, type in Cmd. A black screen named Command Prompt will pop up.
Step 3. Type in “netstat -a”, then press Return.
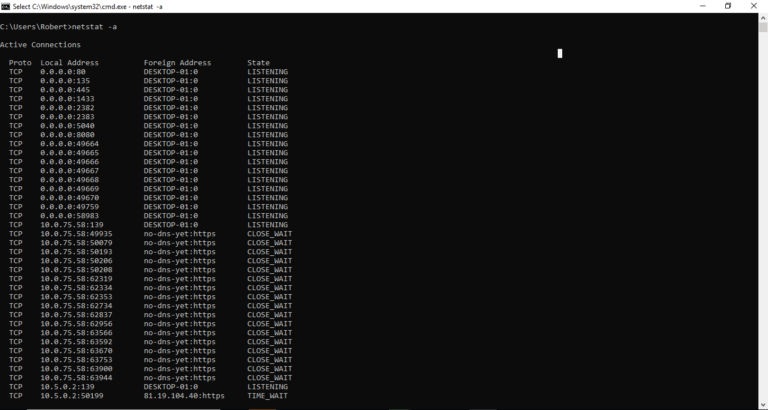
The system will display all incoming & outgoing connections based on IP addresses. Check any strange IP addresses that you may not recognize and isolate them for action.
4. Check for File Version Changes:
This method checks for changes in the File by looking at the last modified date. When a person infiltrates a computer system, they are likely to gain access to files and folders and make changes either intentionally or accidentally. Filtering files by changes separate those that have been modified and can be used to detect unauthorized modifications. To check that, follow the steps below:
Step 1. Press the Windows key+E on the keyboard to open File Explorer.
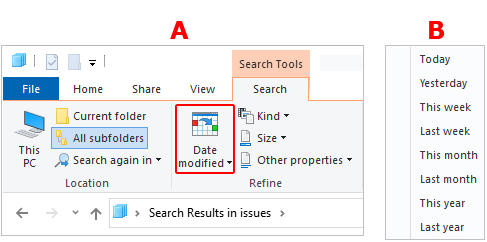
Step 2. On the left side-scrolling menu, select the drive or folder that you want to view the last modified date(s) (A) for the contents.
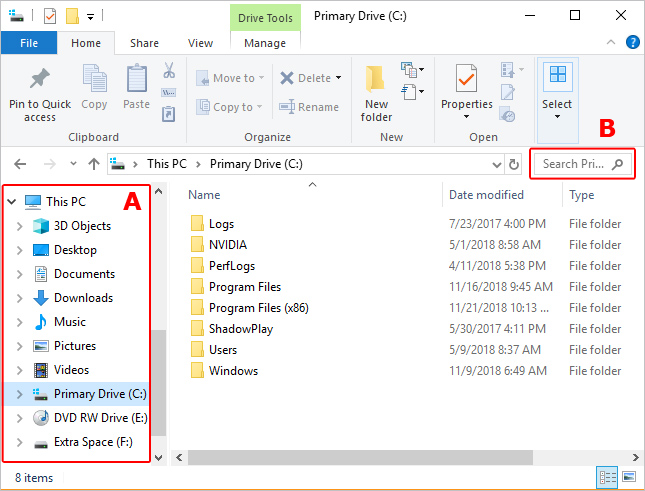
Step 3. On the right side of the screen, type datemodified: (make sure to include the colon) in the search box (B).
Step 4. Once done, all the current drive/folder contents are sorted by the last modified date, from most recent to oldest – If you see any changes that you don’t know, isolate and check them further.
Find files by a specific date or date range, follow the steps below:
Windows 10 & Earlier – After typing “datemodified:” in the search box, click the “Date Modified” button (A) in the top-center menu to select a range of dates (B).
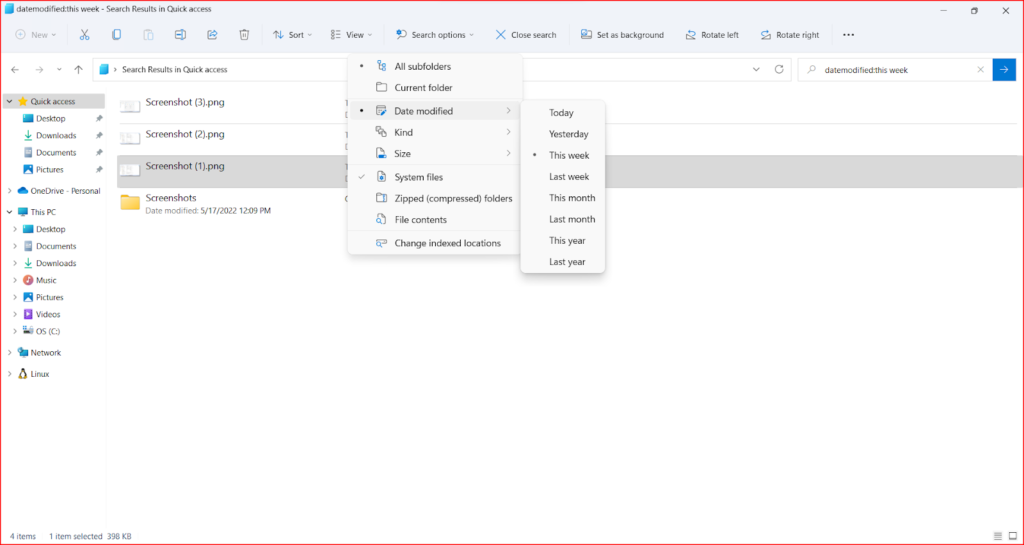
Windows 11 – – After typing “datemodified:” in the search box, click the “Search options” > “Date Modified” > Select range of dates.
How To Check For Unauthorized Access To Your Mac Computer
1. Check the Login History in Terminal:
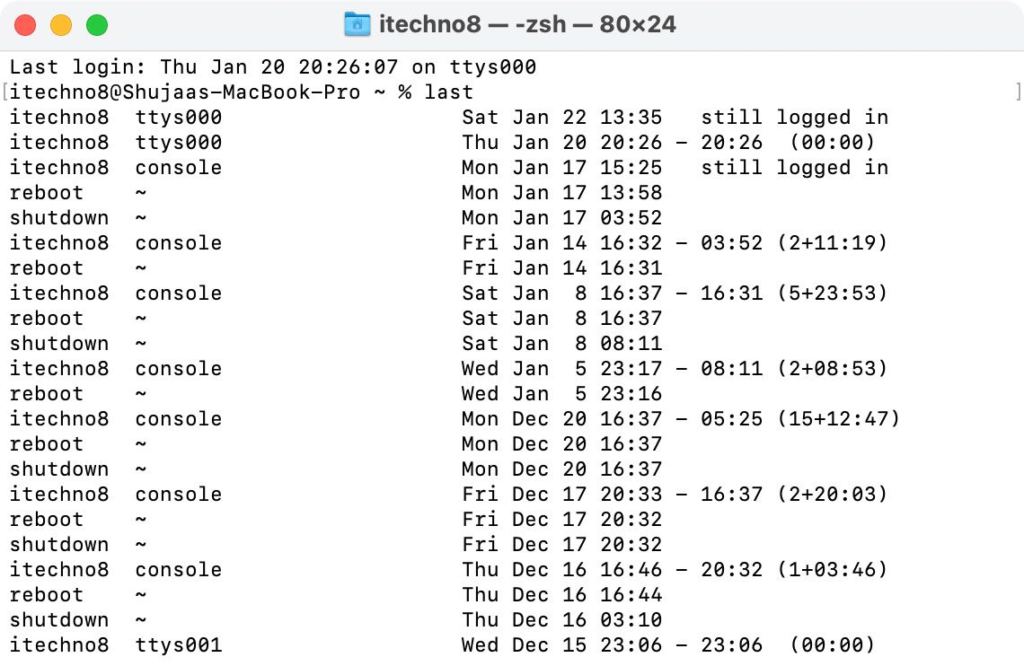
Check your MacBook’s login history by using the “last” command in Terminal. This lists all the login events on your Mac in descending order. It will also include the history of your Mac being restarted or shut down, You can guess whether someone else may have logged in to your Mac. To do this, open up Terminal on your Mac. Type in last and press Enter.
2. Check the Logs in Terminal:
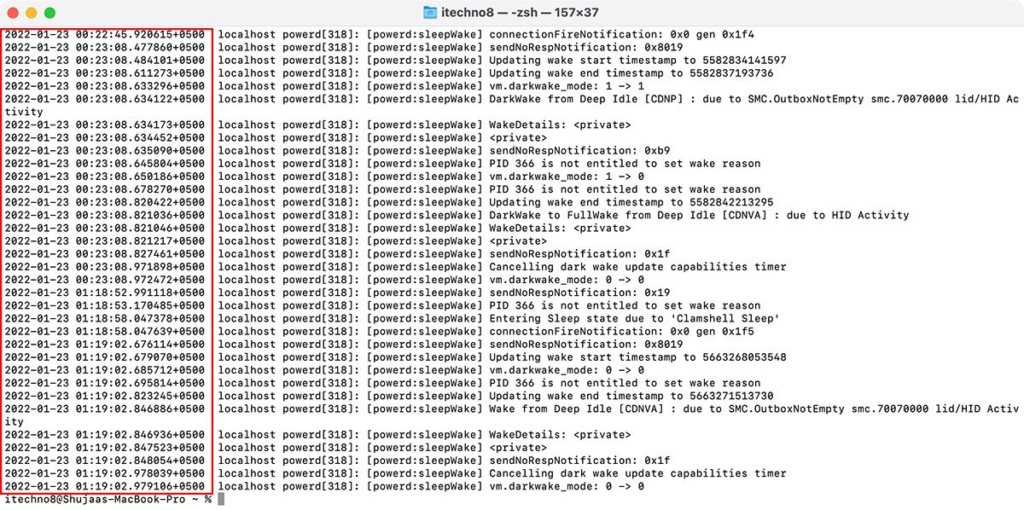
macOS records everything your Mac does in system logs, so access it using the following command in Terminal and press Enter.
( log show –style syslog | fgrep “[powerd:sleepWake]” )
You’ll see a long list of logs. Most of these are system events, so focus on the timestamp on the specific logs to figure out the times your Mac was logged in to. That way you can judge if someone accesses your Mac.
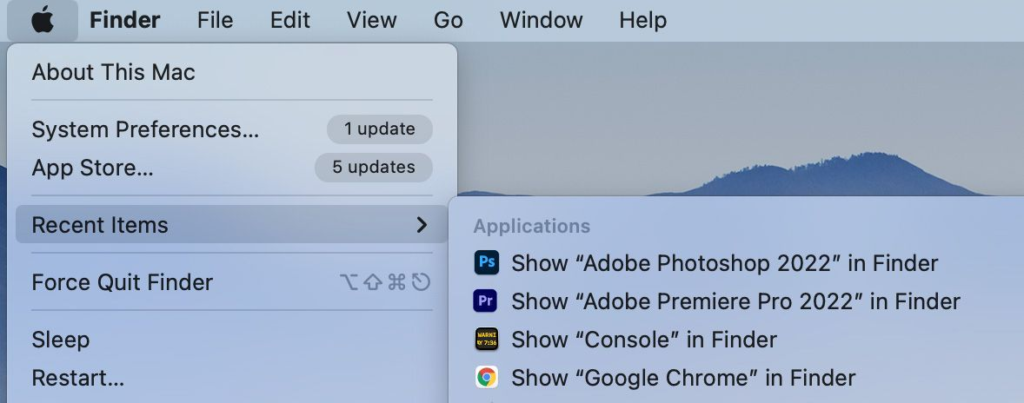
3. Check the Recent Items:
Your Mac keeps track of recently opened applications and documents. See a list of all recent applications and documents by clicking the Apple logo in the top-left corner, then hovering over Recent Items. You’ll see a list showing the applications and documents that have recently been used. If you find something here you know you didn’t look at recently, then that is a red flag of someone using your Mac.
Check your browser history, however, it can be clean. You can also check applications like Microsoft Word and InDesign also have their list of recently opened documents.
Some free tools for Mac and Windows to help with your above issue:-
Mac :
Do Not Disturb
Physical access (or “evil maid”) attacks are extremely insidious yet highly efficient. Do Not Disturb detects and alerts you of such attacks!
LuLu
In today’s connected world, it is rare to find an application or piece of malware that doesn’t talk to a remote server. LuLu is the free, open firewall for Macs, that can
protect your network connections and detect malicious activity.
KnockKnock
“KnockKnock… Who’s There?” See what’s persistently installed on your Mac. KnockKnock uncovers persistently installed software to generically reveal
malware.
TaskExplorer
TaskExplorer allows one to visually explore all running tasks (processes). Quickly see a task’s signature status, loaded dylibs, open files, network connection, and much
more.
OverSight
Mac malware often spies on users by recording audio and video sessions…sometimes in an undetected manner. OverSight monitors a mac’s mic and webcam, alerting
the user when the internal mic is activated, or whenever a process accesses the webcam.
Windows :
Malicious Software Removal Tool
Malicious Software Removal Tool is a free security scanner from Microsoft for Windows users that helps remove specific, prevalent malicious software from computers that are running Windows 10, Windows 8, Windows 7, Windows Vista, Windows Server 2003, Windows Server 2008, or Windows XP.
Windows Defender / Microsoft Security Essentials
Microsoft Defender acts as the antivirus app on your device. It scans files, remediates threats, and lists detected threats in security reports on the Windows Security app.
Depending on which operating system your computer is running, you can use either Windows Defender or Microsoft Security Essentials to get rid of malicious software and viruses.
Windows 8 has built-in Windows Defender to help you get rid of viruses, spyware, or other malware.
Windows 7, Windows Vista, or Windows XP, Windows Defender only removes spyware. So to get rid of viruses and other malware, including spyware, you can download Microsoft Security Essentials for free.
Microsoft Safety Scanner
Microsoft Safety Scanner is an on-demand scanner that flushes out malware, such as a virus, trojan or potentially dangerous software holed up in your system. It requires no administrator privileges for scanning the system and its well-developed wizard, prompts a user to pick from three different types of scan quickly:
- Quick scan
- Full scan
- Customized scan.
Note: No real-time protection is available and usable for just 10 days after launch for the first time. Then repeat the process.
Windows Defender Offline
Some malicious software will not allow you to access Windows Defender or other antivirus software. Windows Defender Offline, earlier called Microsoft Standalone System Sweeper Tool, is a reliable software solution to keep your computer protected from rootkits, find potentially unwanted programs and have them removed from your PC. The primary benefit of using this tool is that it runs before malware, such as rootkits, can hide. The standalone software alerts the user if it comes across any unsafe application, prompting the user to take action (accepts or denies the risk). Thus, offering complete protection in real-time.
0 Comments