
How to resolve a disabled iPhone issue
Is your iPhone showing “iPhone is disabled” on its lock screen?
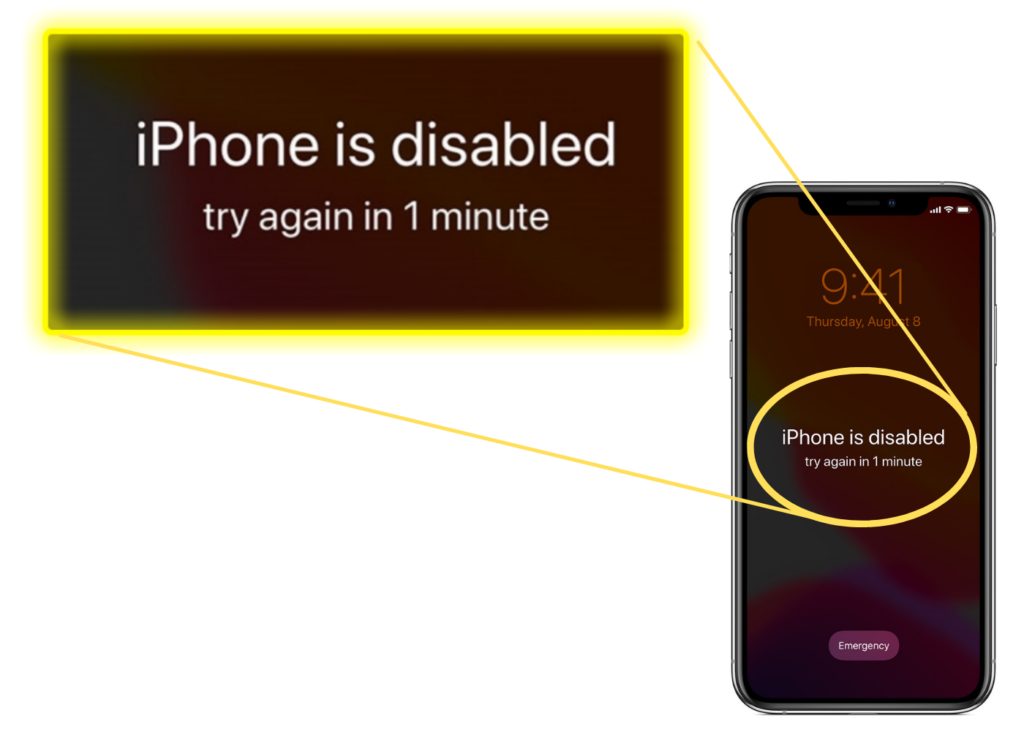
One of the most common reasoning for this issue is when you attempt too many wrong pass-codes. In the worst scenarios, the message says “iPhone is disabled. Connect to iTunes”.
Disclaimer: There is a strong possibility that your data might get deleted during this procedure. Users who are trying out this procedure are advised to have a backup of your device before performing the following steps.
You can resolve this issue by following the steps shown below:
Step 1. Prerequisites
- To resolve this issue, you will need a Mac or a PC (Windows 8 or later) having installed the latest iTunes version in it.
- The lightning cable that came with your iPhone.
- And a good internet connection.
Step 2.
- Turn off your iPhone with respect to your iPhone model by referring the image given below.
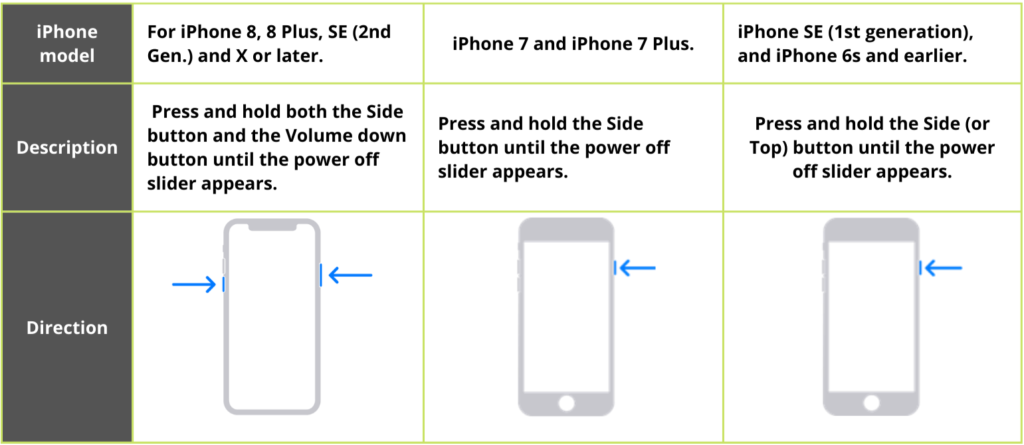
- When the power off slider appears, drag the slider to turn off your iPhone, then wait a minute to make sure that it turns off completely.
Step 3.
Put your iPhone in recovery mode:
- To put your iPhone in recovery mode, hold the button shown below according to your iPhone model.
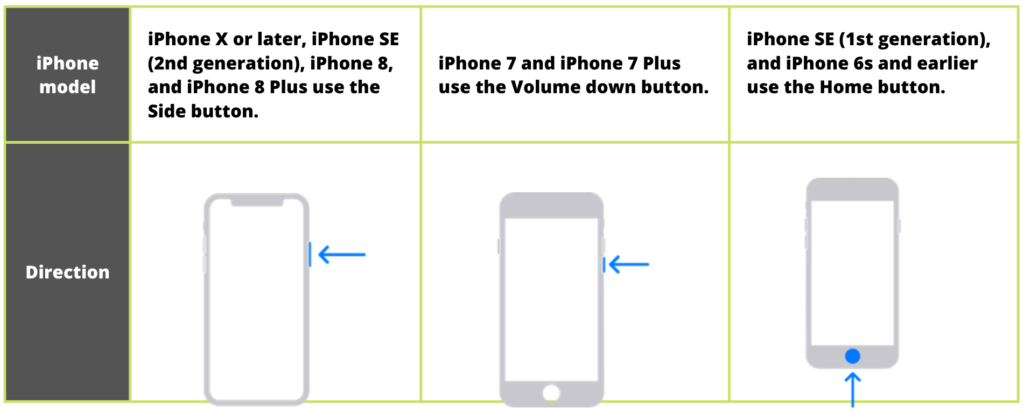
- Press and hold the correct button for your iPhone while immediately connecting your iPhone to the computer. Don’t let go of the button.
Step 4.
- Keep holding the button until you see the recovery mode screen on your iPhone, then let go.
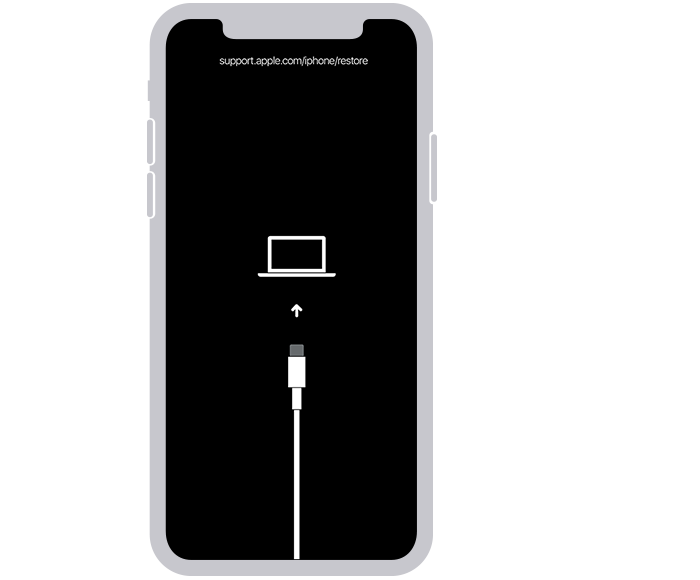
Note: If you see the pass-code screen, you need to turn off your iPhone and start again from step 2.
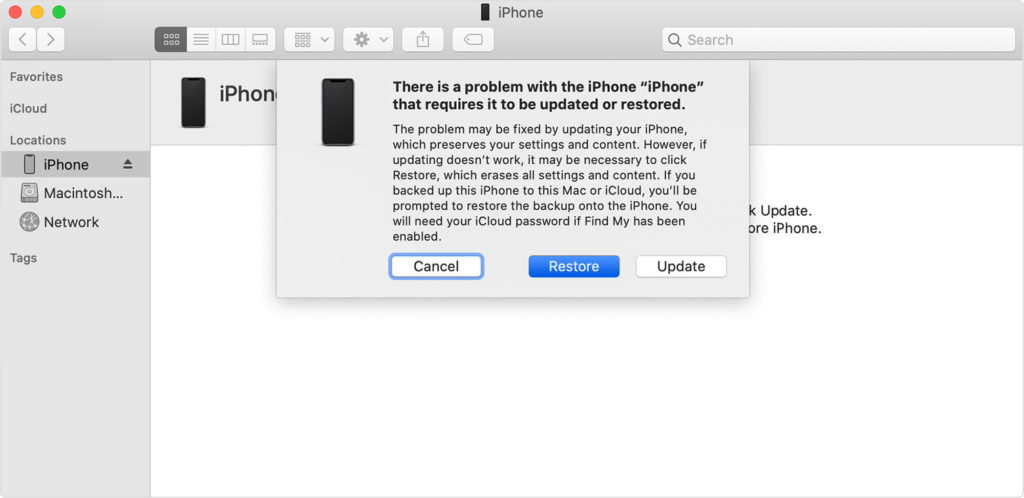
Step 5. Restore your iPhone
- Locate your iPhone in the Finder or in iTunes on the computer that it’s connected to.
- Choose Restore when you see the option to Restore or Update. Your computer downloads software for your iPhone and begins the restore process.
- If the download takes more than 15 minutes and your device exits the recovery mode screen, let the download finish, then turn off your iPhone and start again.
- Wait for the process to finish.
- Disconnect your iPhone from the computer, then set up and use your iPhone.
0 Comments