
Best Practices to protect your privacy and stay secure on Facebook
Facebook reign as the social network of choice but hasn’t always been rainbows and unicorns. It has had its fair share of controversies, usually; concerning privacy and how it uses the data it gets from its users. That, in turn, raised questions about how to protect users’ data and how it is handled. However you can follow the Best Practices mention below to protect your privacy and stay secure on Facebook from your side instead of just speculating.
1. Lock down your profile
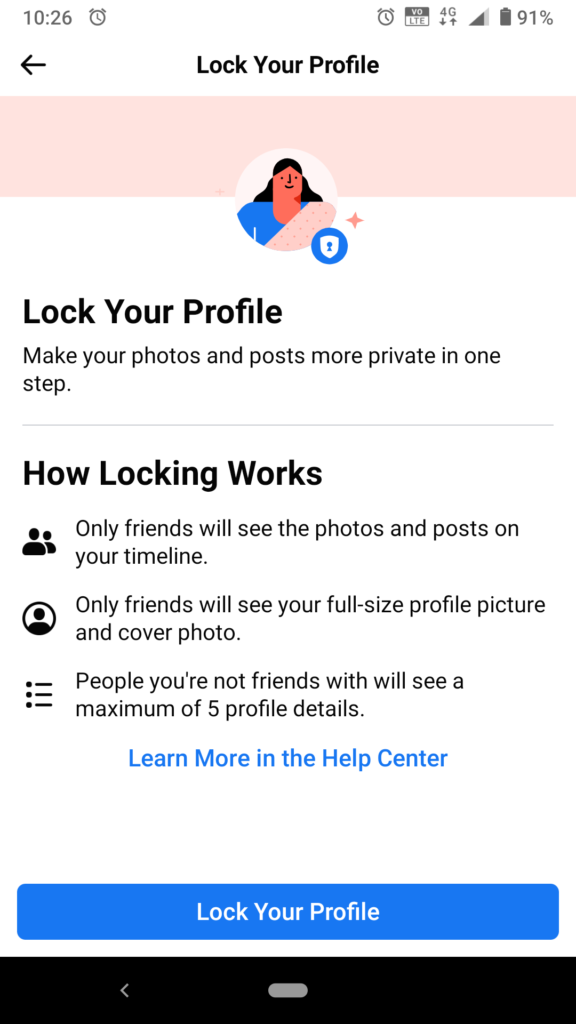
It’s great to have an idea of what information others can see about you when they click on your profile. That includes both your personal information and the posts that you share with the world. The good thing is that you can toggle the individual options according to your needs. If you want to go the extra mile, you can also secure your friend list. To be sure how your profile looks to the outside world. Go to “Your Profile” and then choose “3 dots” besides “Add to Story” then select “View As” option; this will allow you to see it through the lens of the public and you can adjust it accordingly. To Lock your profile:- Go to “Setting & Privacy” > “Setting” > “Profile Locking”, here select “Lock Your Profile“.
2. Use Two-Factor Authentication
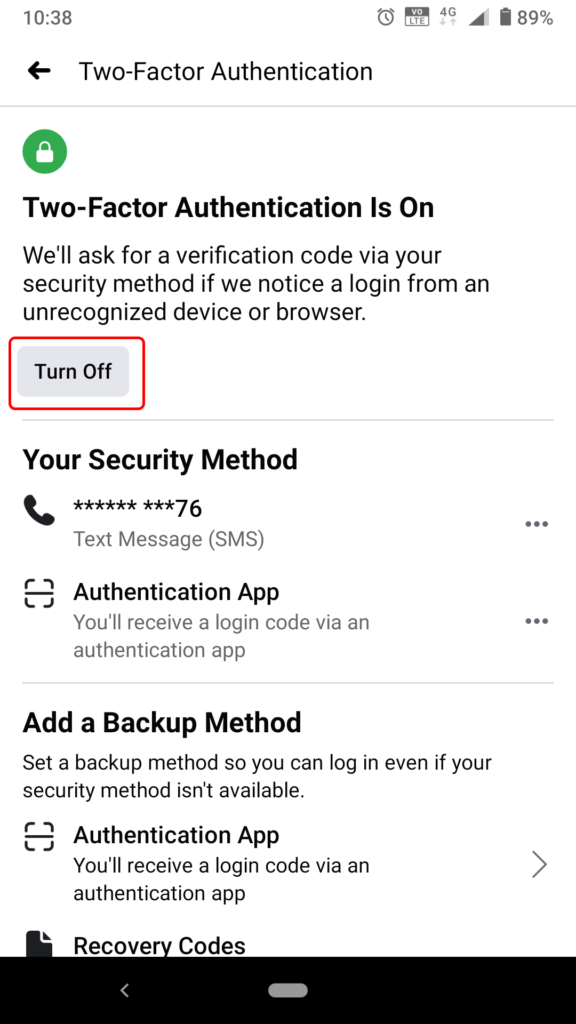
Worried that someone will log in to your Facebook account and pose as you? Turn on two-factor authentication, which will send you a text message with an authentication code every time you log in to Facebook on a new device. You’ll then have to type in the code to complete logging in.
ON MOBILE
Go to “Setting & Privacy” and “Settings”. Then choose “Security and Login”. Select “Use two-Factor Authentication” and then click “Turn on”. You can then choose the 2nd security method through Text Message or if you’d prefer to instead use an authentication app like Google Authenticator, toggle on “Authentication App” instead. The app will see if you already have one installed. If you don’t, it will suggest one.
3. Audit your posts
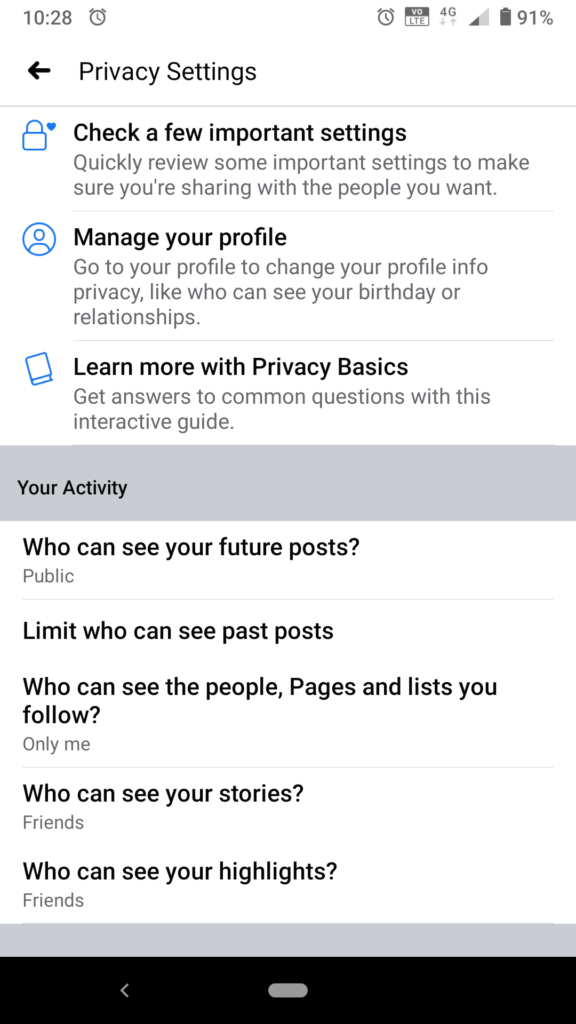
Auditing your posts should not be ignored. You never know who will see that embarrassing moment from ten years ago that you shared and never looked back. You can either scroll through years of posts manually or, in the settings, you can limit who can see your past posts and even your future posts as well.
Go to “Setting & Privacy” > “Setting” > “Privacy Setting” > Under “Your Activity” section, you can see another section “Limit who can see past posts”.
Here you can choose according to your desire.
4. Check Timeline and tagging
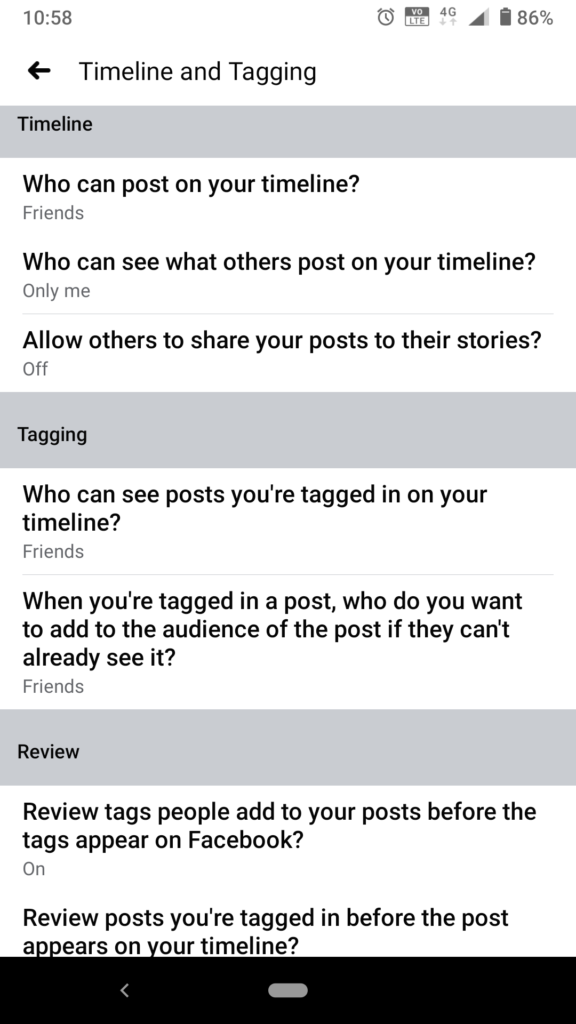
Let’s just imagine a situation where someone posts an embarrassing photo with you on Facebook, a photo your friends or family members should not see. That’s why you should always hand-approve each tag, on any social media platform. To do this, follow these steps:
Go to the “Setting & Privacy”, and then to “Settings”. Under Privacy section select “Timeline and Tags”. Now under Timeline section, you can choose who can post on your Timeline and who can see it. And under Review section, turn on “Review tags people add to your posts” and “Review posts you’re tagged in before it appears on your timeline”.
5. Block Suspicious Accounts
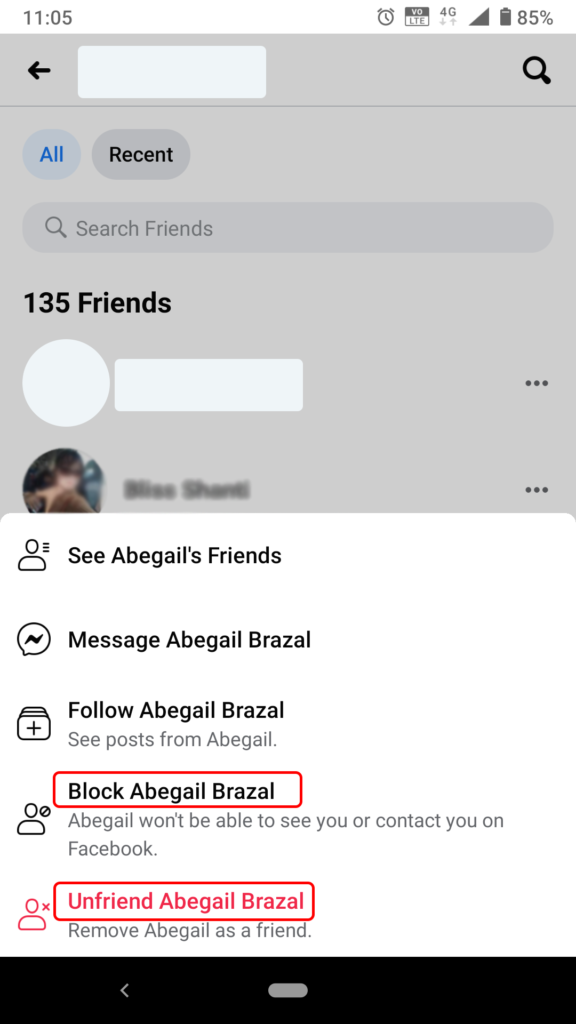
It’s good digital practice to regularly cruise through your facebook friend list and make sure that you don’t have spam accounts or suspicious accounts there. If any one of your facebook friend becomes annoying (or worse), you can block the specific friend from seeing your posts. (Don’t worry: your friend aren’t notified that you’ve blocked them.)
ON MOBILE Go to “Your Profile” and then choose “See All Friends”. Then search for the facebook friend you want to block. Click “3 dots” besides the friend account. Now you can either “Unfriend or Block”, if you block, they won’t be able to see or contact you on facebook.
6. Revoke Access to Third Party Apps
Most likely you logged in using your social account to third party apps. It can be other social networks, or services that analyses your number of facebook friend, post on your behalf and so on.
For security and privacy matters, you should only allow access to the apps that are trustworthy. Remember that those apps have access to your profile and personal information, thus making you vulnerable.
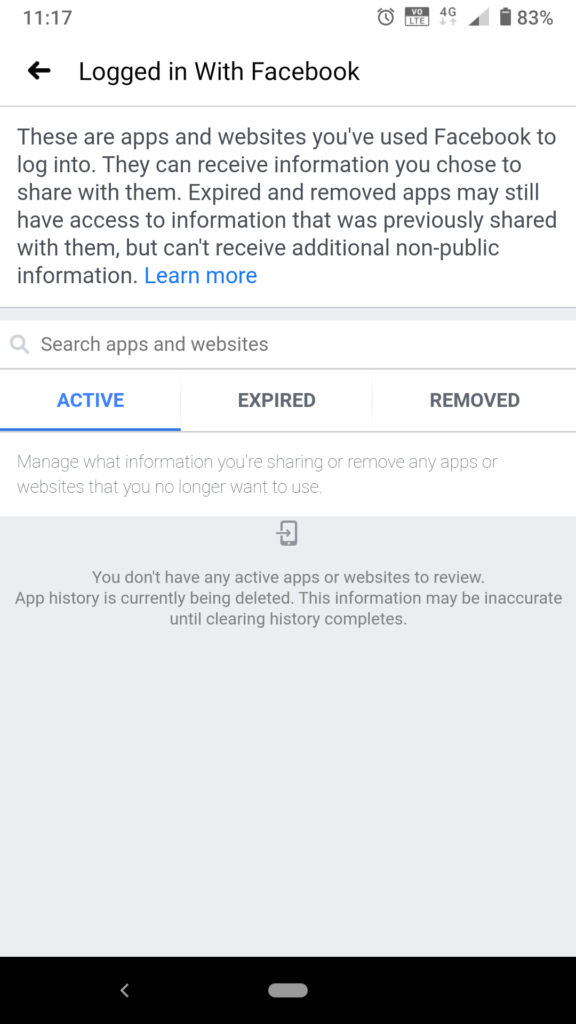
So take your time and do a spring cleaning. Check every single app that you allowed to access and use your Facebook account. Revoke access to the ones that you don’t use anymore, look suspicious or you can’t even remember them.
Here’s how to do that: Go to the “Setting & Privacy”, and then to “Settings”. Under security section select “Apps and Websites“, then choose “Logged in with Facebook” that will pull up a list of “active“, “expired” and “removed” apps. If you haven’t authorized the apps listed, or no longer want them connected to your Facebook account, you can click “Remove” and it will immediately revoke access.
7. Check if someone has hacked your Account
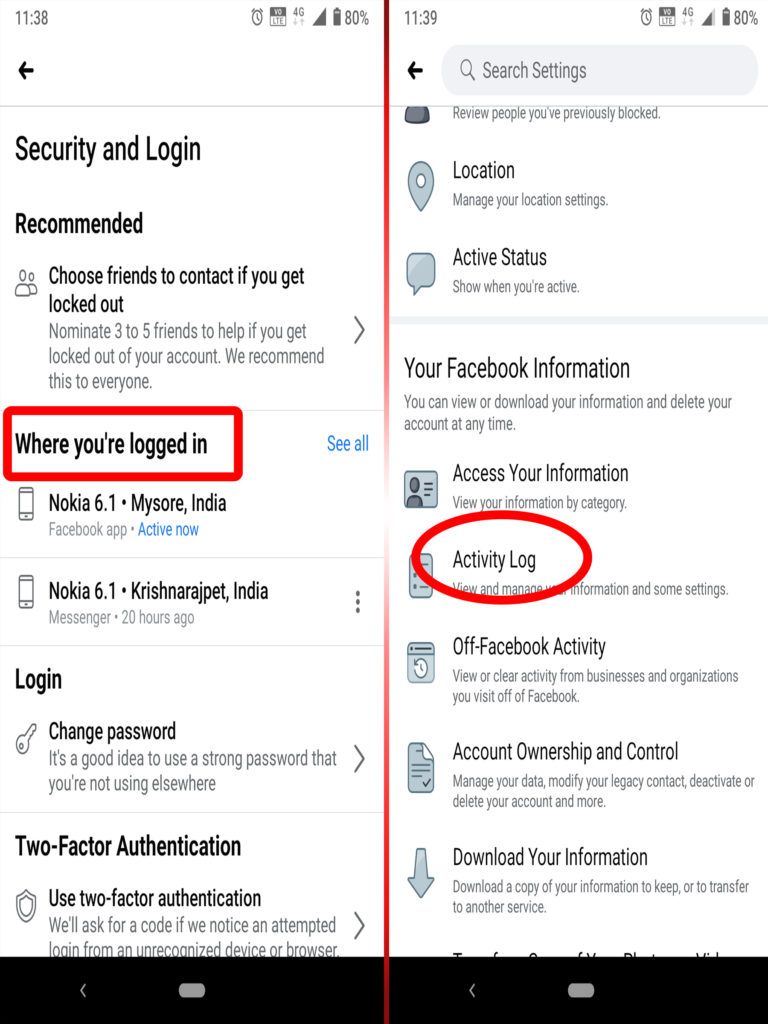
Worried that someone has hacked your Facebook account? You can check by viewing your “Activity Log” or “Where you’re logged in”, and more.
Go to the “Setting & Privacy”, and then to “Settings”. Scroll down and select “Activity Log”. (Here check for any fishy activity you are not aware of).
Or Go to the “Setting & Privacy”, and then to “Settings”. Choose “Security and Login” and see “Where you are logged in“. If you see any unfamiliar device or place, it may mean that someone else is using your account. Immediately change your password or set up 2-factor authentication to lock them out.
8. Don’t expose your location
Another important step you can take to keep yourself secure from identity theft and hide your account’s credentials from online criminals, is to make sure your location services for Facebook is turned off. You can turn off your Location Services for Facebook through your Phone’s “settings”> “Privacy”> “Permission Manager”> “Location”> Select “Facebook”, and then Check Box “Deny”.
If it’s too late to do that and just want to remove check-ins you already have, this is how you remove location from Facebook photos:
1. Go to your Facebook photos
2. Find those photos that have a location attached to them and hit the location icon (top right corner, besides three vertical dots) and it will take you to another page. At the bottom left corner besides the location name, you will see Cross.
3. Click that cross icon “X” and location will be deleted.
0 Comments