
How to Back up and Restore Mac
It is considered a best practice to regularly create backups. There are multiple reasons why you should backup your Mac. Among the most important are:
- Backups offer protection that can help you recover from unexpected data loss situations.
- Backups can be used to recover user data after reinstalling macOS or when setting up a new Mac.
- Backups protect you in the event of a catastrophic disk failure or data loss on solid-state drives.
- Backups provide a method for recovering historical copies of documents and files.
How to Back up your Mac
Method 1: Backup your Mac with Time Machine
Apple provides users with an easy way to backup their system and data with a backup utility in the Mac operating system known as Time Machine. Follow the steps below:-
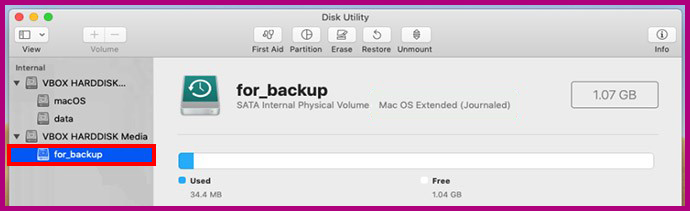
Step 1. “Connect your Storage Device” to your Mac.
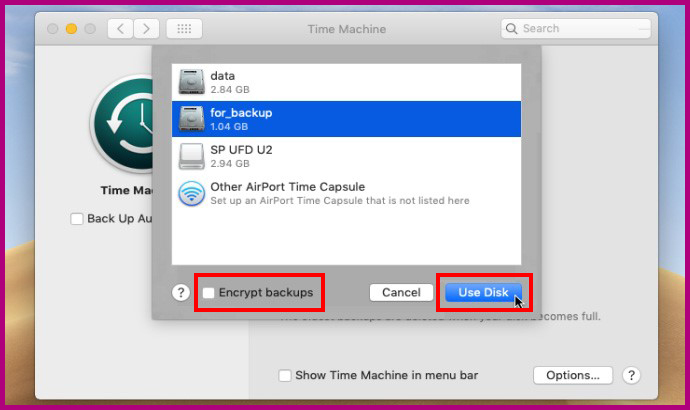
Step 2. Check the box to “Encrypt backups”. Then click on “Use Disk”. If your drive is not recognized automatically, open up Time Machine preferences and manually add the disk as a backup target.
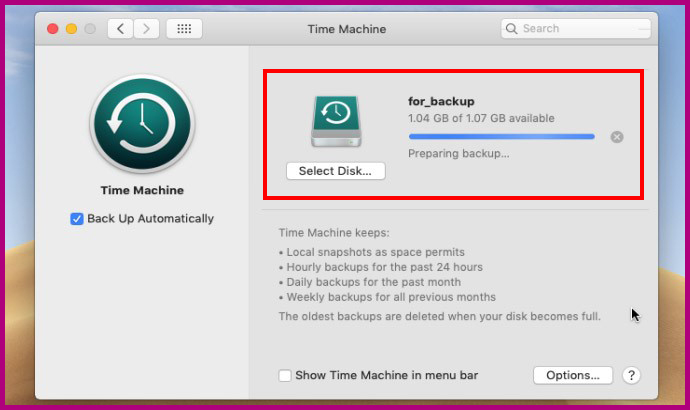
Step 3. Once the “Disk is Selected”, Time Machine will “begin creating a backup”. The time required for subsequent backups will vary based on the number of new files or changes made to your system since the previous backup.
Method 2: Backup your Mac to Cloud storage
Apple provides free storage of 5 GB on iCloud for every Apple ID, so you can use that to backup Mac. Backup data on iCloud can be accessed from anywhere. Follow the steps below:-
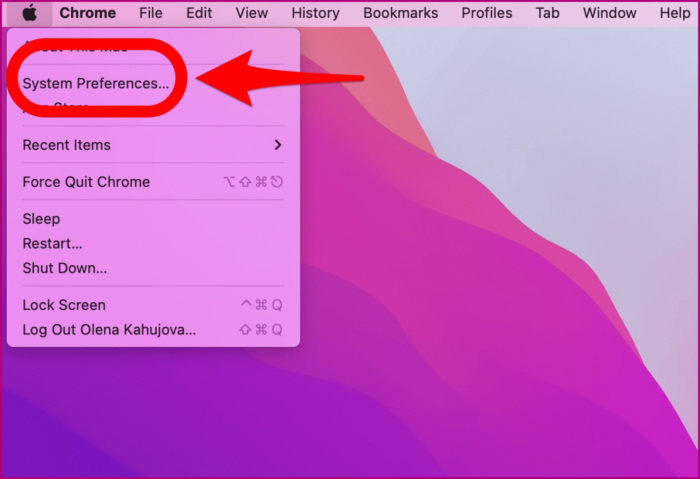
Step 1. Click the “Apple” icon on the top left corner screen and a drop menu will appear.

Step 2. Open “System Preferences”.
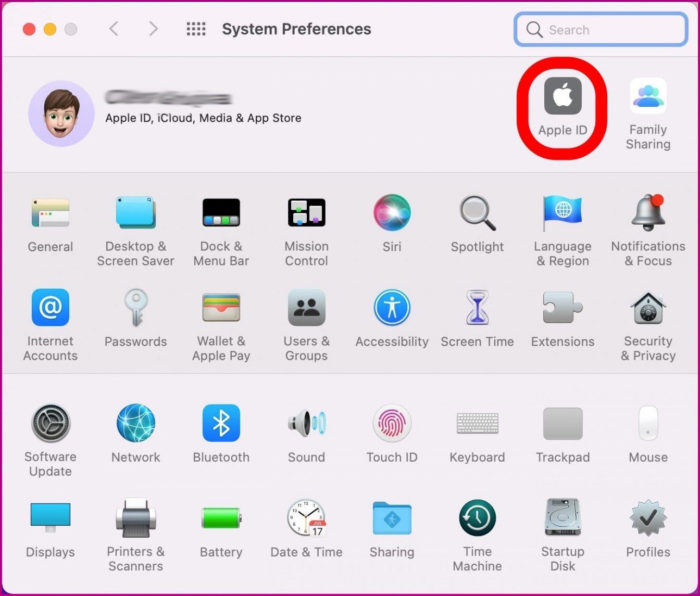
Step 3. Click “Apple ID” on the top right corner.
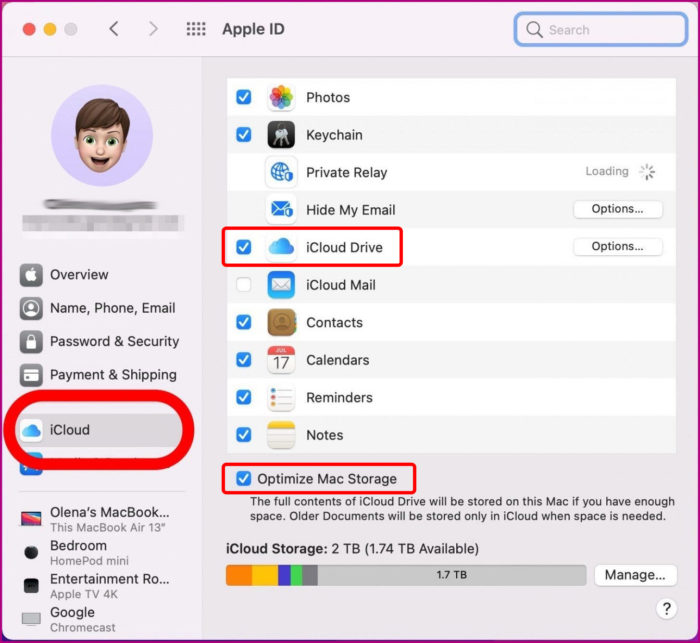
Step 4. Click “iCloud” on the left screen & sign in to iCloud if prompted. Then Check box “Optimize Mac Storage” and “iCloud Drive“.
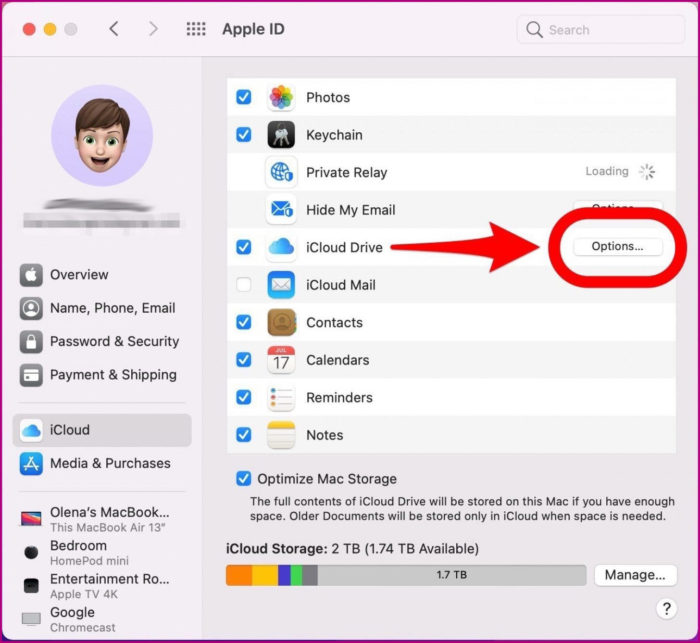
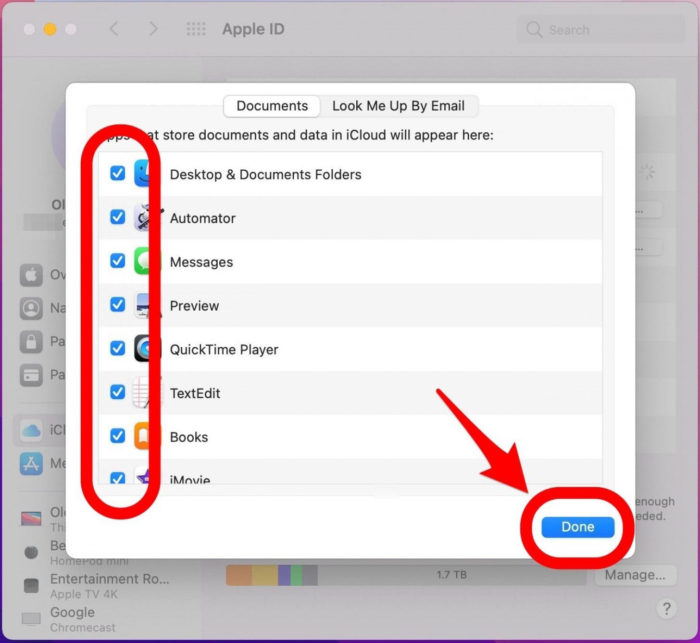
Step 5. Click on the “Options” button next to iCloud Drive.
Step 6. “Check the box” next to anything you want stored in your iCloud drive, such as “Desktop & Documents” or “Message data”. Then Click “Done“.
Method 3: Backup software to Clone your Mac Hard Drive
You can use an external storage device to hold a clone of your hard drive but the external drive needs to be at least as large as your primary disk in order to ensure enough room to store the cloned copy. Clones can be used as your main backup method and can also be instrumental in data recovery efforts by minimizing disk usage on a damaged drive.
There are lots of software that can clone your Mac, some are free and some paid. Disk Drill software for Mac offers a free way to clone your Mac. The tool can use the clone to enact data recovery functions or you can simply use it as a backup that is an exact copy of your original disk. Follow the steps below:-
Step 1. Download and install “Disk Drill” on your Mac.

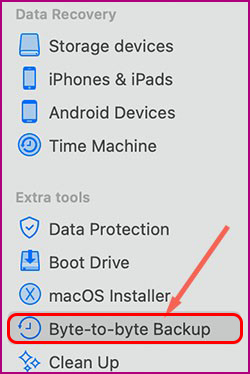
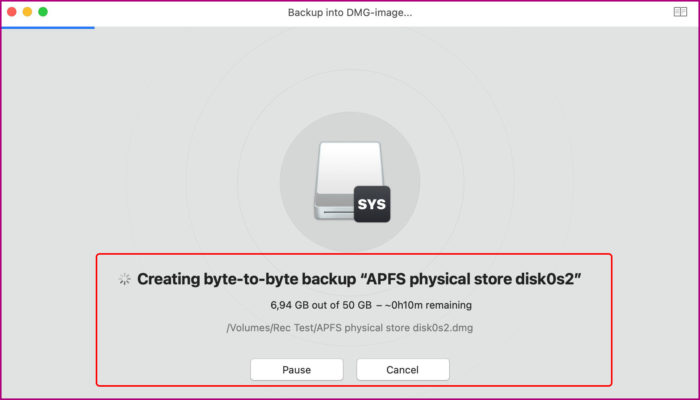
Step 2. Open Disk Drill and select “Byte-to-byte Backup” from the left panel.
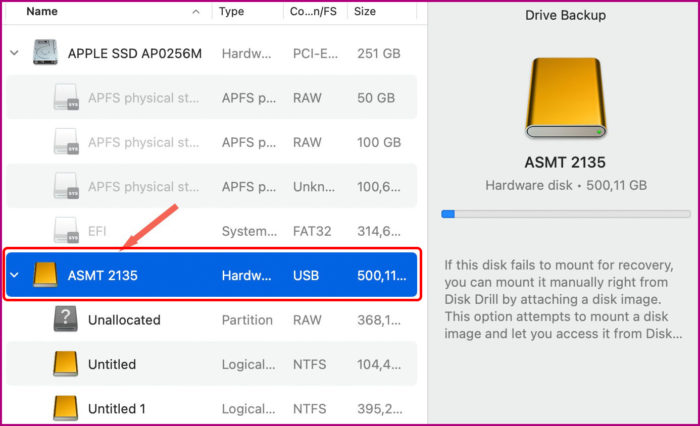
Step 3. “Select the drive” to make a disk image.
Step 4. Press “Create backup“. Disk Drill will warn you if there is not enough space for the clone. If there is no warning, the program begins to create the clone.
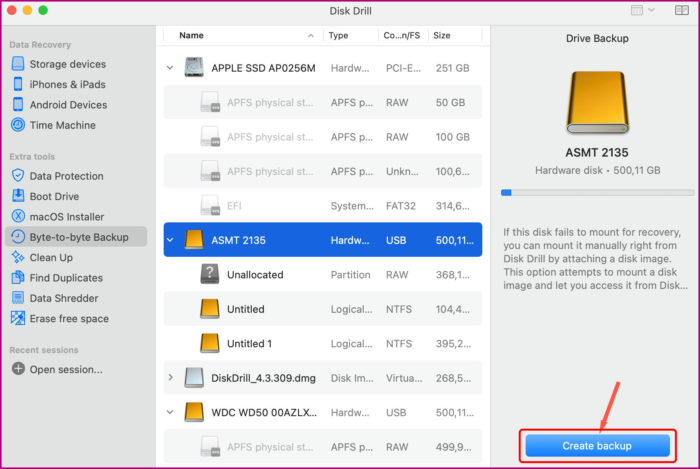
Step 5. Wait for the backup to be created, now you have a DMG file that is a copy of your hard drive. This clone can be used for data recovery operations, or simply stored as a backup of your machine.
How to Restore your Mac
Method 1: How to Restore Mac from a Time Machine Backup
There are two types of full restore using Time Machine Backup:-
A) First method recovers all of the backup data, including the Mac OS, apps, documents, settings, etc., that were part of a backup. Click here to know how to use the first method.
B) Second method recovers only the apps, documents, settings, and lots of miscellaneous items, but doesn’t recover the Mac OS. The Second method is used when you’ve already performed a clean install of the OS and only wish to have your files and apps restored or if there’s nothing wrong with your Mac and you do not need to reinstall its operating system. You can perform the second method restoration using the Migration Assistant app in the utilities folder on Mac and the Time Machine backup. Follow the steps:-
Step 1. Connect the “Drive” that contains the Time Machine backup to your computer.
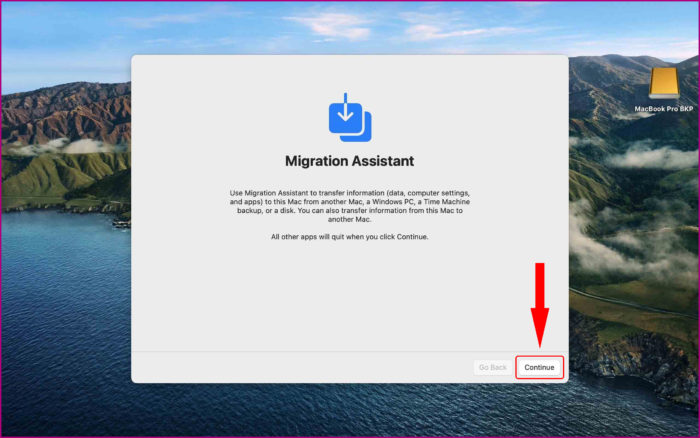
Step 2. Open “Migration Assistant” which can be found in the Utilities folder inside the Applications folder. Then Click “Continue”.
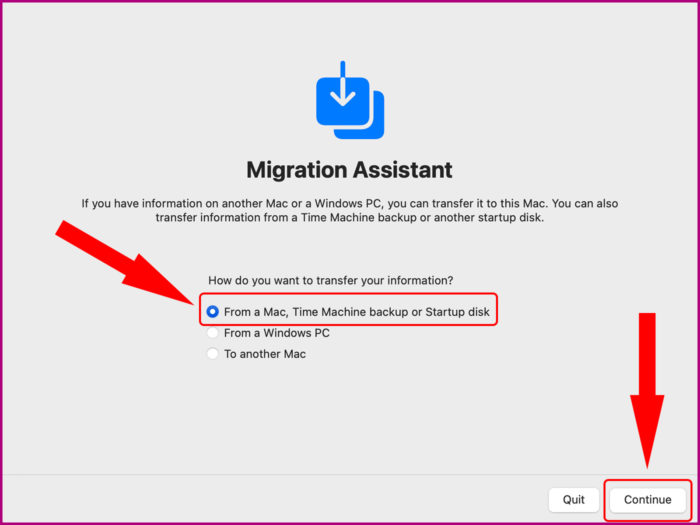
Step 3. Select the option to transfer “From a Mac, Time Machine backup, or startup disk“. Then Click “Continue“.
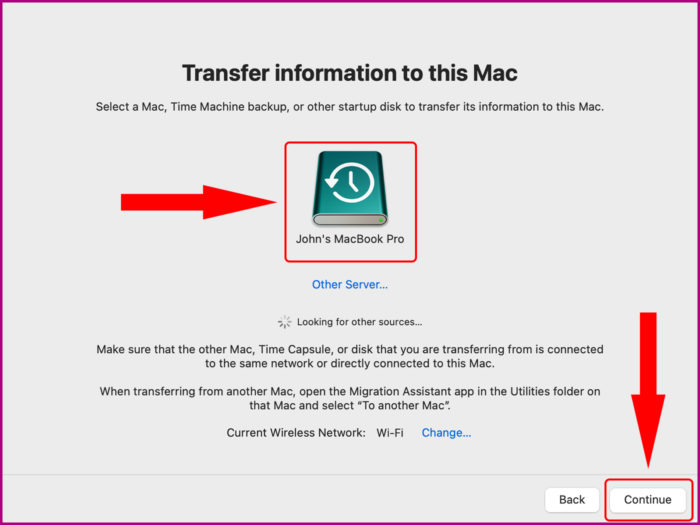
Step 4. Select your Time Machine backup, then click “Continue“.
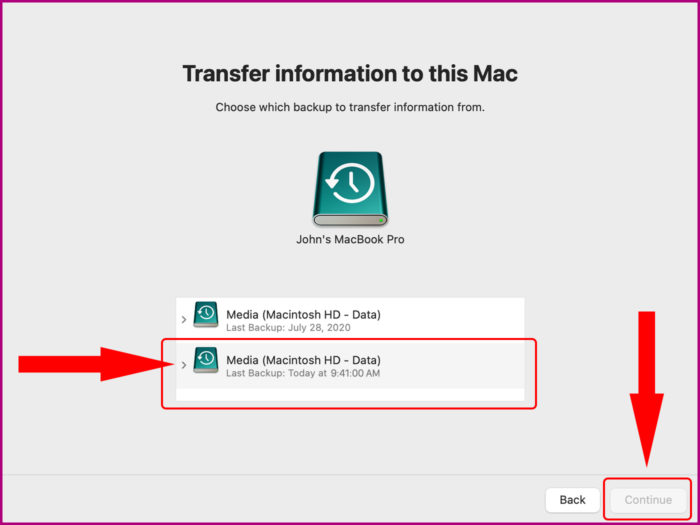
Step 5. Select which backup you wish to use for data recovery and click “Continue“.
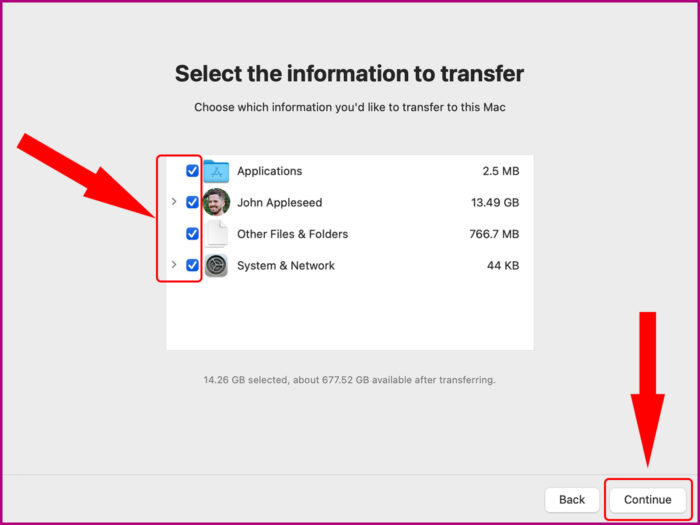
Step 6. “Check Box” the information to transfer. Then click “Continue” to start the transfer. It may take several hours for large restores to complete.
Method 2: How to Restore Mac from External Hard Drive Backup
Your Mac supports data recovery from a local backup, including during the startup process. Disk utility can restore from an external hard drive. If you can still access your backup files on an external drive, follow these steps:-
Step 1. Connect the hard drive containing your backup to your Mac.
Step 2. Turn on your Mac and hold Command + R to enter Recovery Mode. Wait until your Mac boots to the macOS utility screen. If that doesn’t work, try turning your Mac on and keep pressing the “power button” until you see the startup options screen.
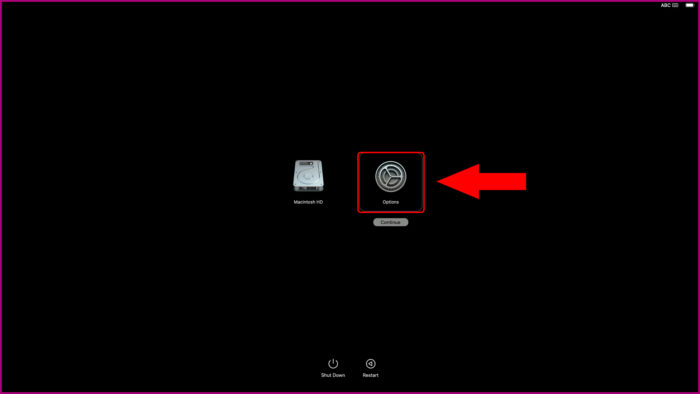
Step 3. Select “Options”.
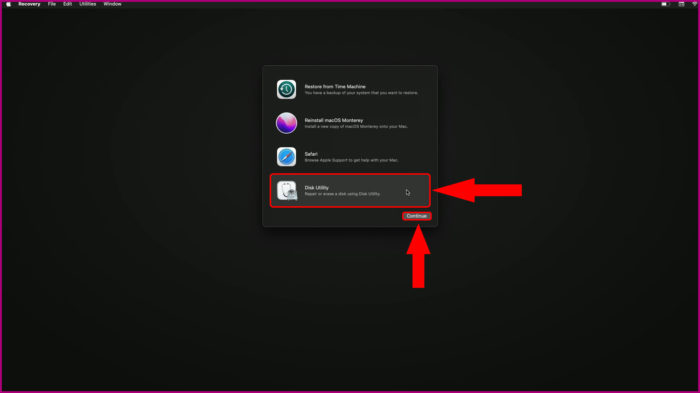
Step 4. Click on “Disk Utility” and then click “Continue”.
Step 5. Select your “Hard Drive”.
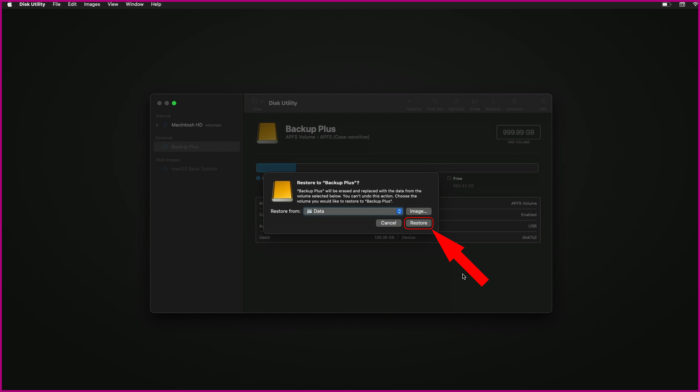
Step 6. Select “Restore” from the top options and select your external hard drive as a source.
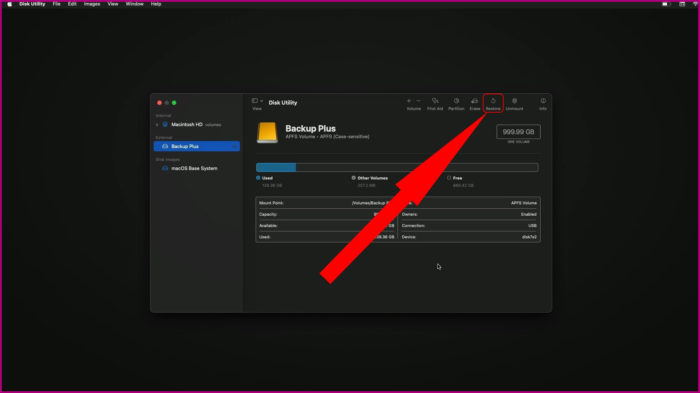
Step 7. Select your “Mac’s hard drive” as the destination.
Step 8. Click “Restore”.
Method 3: How to Restore Mac from a Cloud Backup
Each cloud-based backup service is different. All of them will require that you download the backup from their remote servers first. Therefore using a cloud-based backup service to restore your Mac is very time-consuming and less efficient than restoring directly from an external hard drive. But still if you wish, you will have to first download the latest version and copy it to an external hard drive or USB stick. After that, you can follow the above steps to initiate the recovery process.
Check to verify that your backup is saved in a suitable format that will allow you to immediately recover from it. In some cases, backup tools might automatically compress your cloud backups before they’re uploaded to save space. In such cases, you will first have to decompress the backup, as otherwise you won’t be able to use it directly.
Disclaimer:-
Steps shown here may not match exactly with your Device as Devices vary in version, hardware & software. But it should give you a good idea on how to do it.

0 Comments