
How to Check Your Mac for Viruses and Malware
For a long time, there has been a notion that Apple computers are immune to malware, but that is not the reality. Although malware designed for Apple computers is lesser in number compared to those targeting Windows computers, they still exist, and it is a growing problem for Mac users. With more people using Apple computers now, cybercriminals’ attacks have also increased over the years. Following best practices and using antivirus software can help you avoid malware infections. But although rare, viruses, worms, ransomware, and other digital threats can sneak into your device anyway. When it happens, you need to know you are compromised so that you can work on removing the malware. That’s why it’s so important to check your Mac for malware regularly and here is how:
How to spot signs of malware:-
Some malicious software can remain undetected, while some are noticeable. Look out for the following red flags indicating it’s time to check your Mac for malware:
When your Mac is slower than usual – This could be a sign of someone using your computer for mining cryptocurrency or running DDOS attacks.
When you receive security alerts without scanning your Mac – Scareware could be the culprit here. It’s a kind of like a malware agent capable of pressuring you into installing more malware through scare tactics.
When your browser has a new homepage or extensions you haven’t added – This is a sign your browser has been hijacked and is directing you to malicious third-party sites.
When you are bombarded with ads – This is a typical indication of adware. While not too dangerous, this type of malware generates profits from ad clicks.
When you can’t access personal files and see a ransom/fine/warning note – Among various signs of malware on Mac, this is the most clear cut. It could be a result of a trojan horse or a case of ransomware — malicious software used for extortion.
When your friends receive spam from your accounts – If your friends start receiving spam from your social media accounts or email, your Mac may have been infected with virus.
1. Using built-in tools to check for malware on your Mac
Mac comes with antivirus software built-in called XProtect, which scans your Mac for malware using a database of virus signatures maintained by Apple. This is enabled by default, so you don’t need to do anything to use it. If you download malware and try to run it, XProtect can detect it and stop it from running. But Apple isn’t a dedicated security company, so XProtect does not detect as many viruses as dedicated security companies do and you can’t run a scan to check your Mac for malware.
2. How to check Activity Monitor for Mac malware
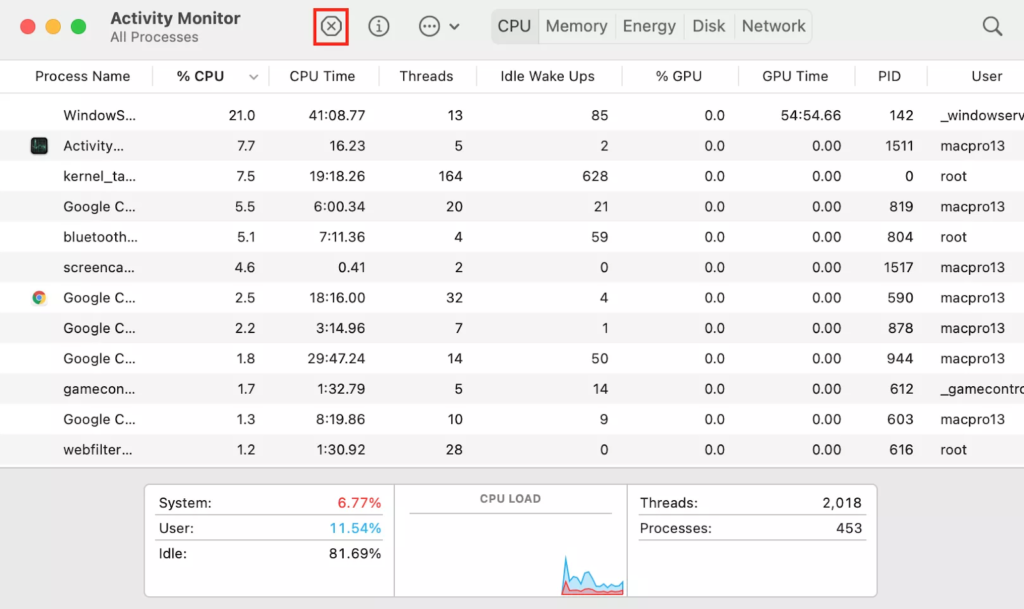
If you doubt that your Mac has been compromised, one of the best places to look is Activity Monitor. Here, you’ll be able to see the background processes and apps running on your computer – including malware. Sometimes you need to stop malware from running on your Mac before you can remove it. For that, you can follow the process below:
1. Go to Applications > Utilities > Activity Monitor
2. Go through the list of apps and search for ones with abnormally high CPU (%CPU) or memory usage
3. If you see a process that looks suspicious, do a search on Google or any alternative search engine you use to search on it. You should find information that confirms whether or not it’s malware
4. Click on the ‘Process Name’ of the app you want to close and then click on X on the upper left area of the window. This will close the app.
5. Search the corresponding file names in Finder and delete them
6. Empty the Trash
3. How to find unwanted applications
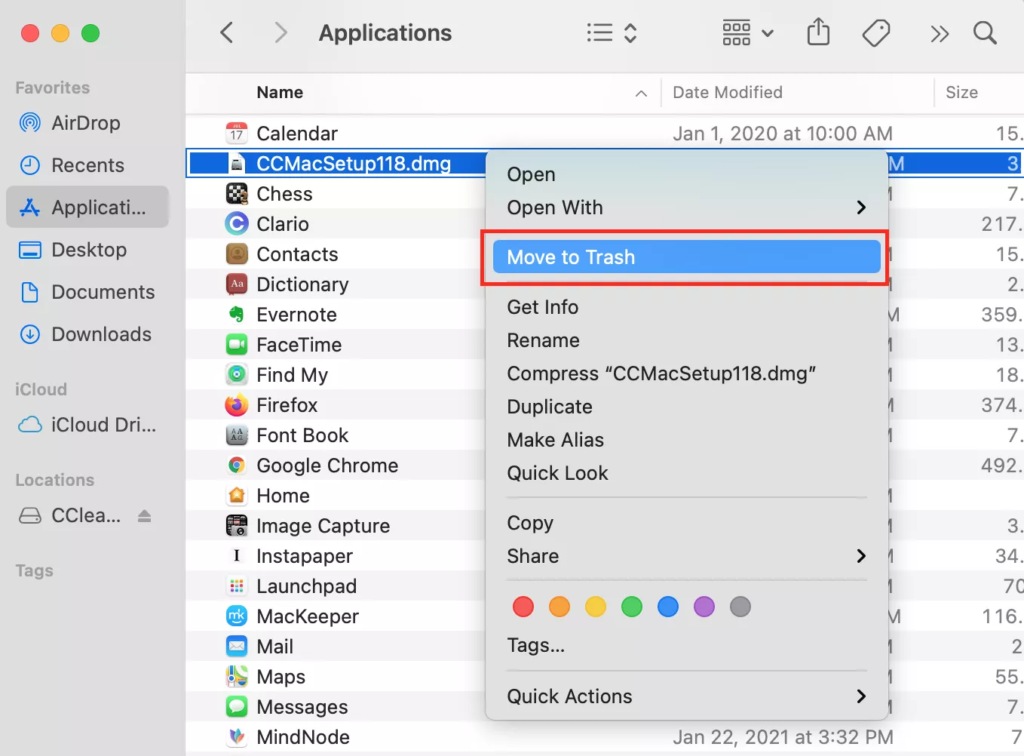
Malware often enters your system along with legitimate software. If you don’t remember installing an app or haven’t used it for a while, it probably shouldn’t be there. Here’s how to look for suspicious apps:
1. Open a new Finder window and on the left sidebar.
2. Select the Applications folder.
3. Scroll through the list and look for any apps you don’t recognize or don’t remember installing
4. Check on Google or alternate search engine to see if they’re legitimate or not
5. If they’re not, or if you are suspicious, delete them and then empty your Trash
4. How to check suspicious login items
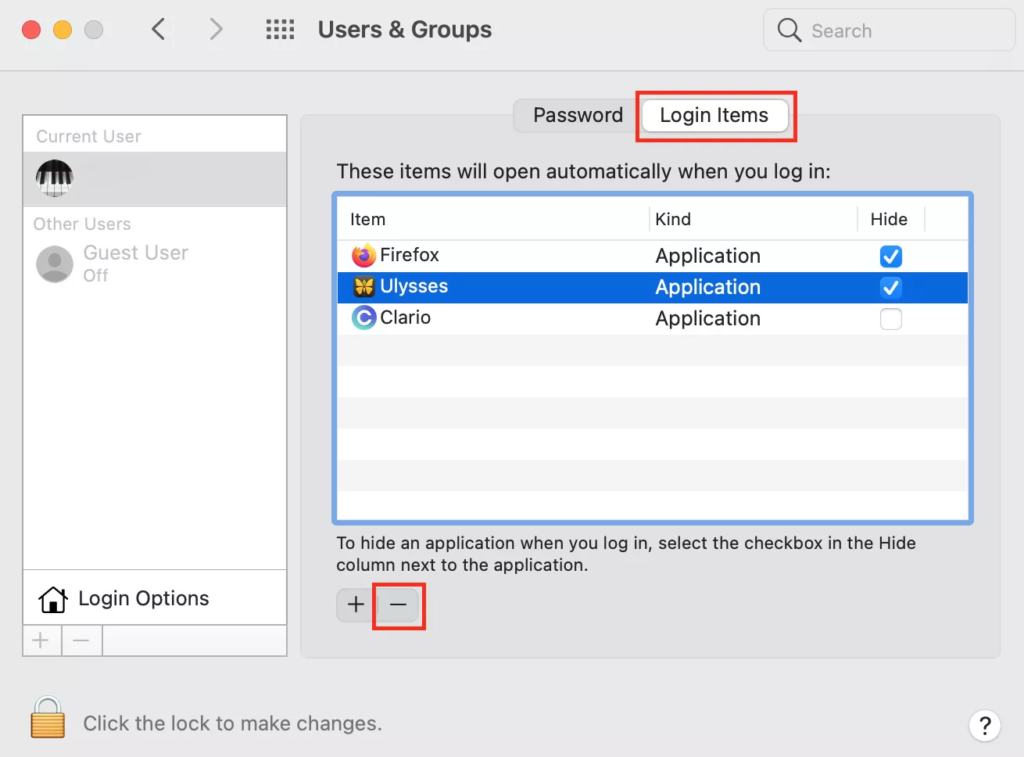
Malware will often load automatically when you start your Mac, so you might find it in your macOS login items list. You can stop auto starting an app in a few simple steps.
1. Click the Apple icon in the top menu and go to System Preferences
2. Click Users & Groups and move over to Login Items
3. Check the boxes next to all suspicious login items
4. Click the minus sign to remove the items
5. How to check homepage address in browser settings and remove unknown extensions
Hijackers could divert your traffic and spy on you or steal your data. While the process is similar in all browsers, it is best to refer to your browser’s help page for specific details.
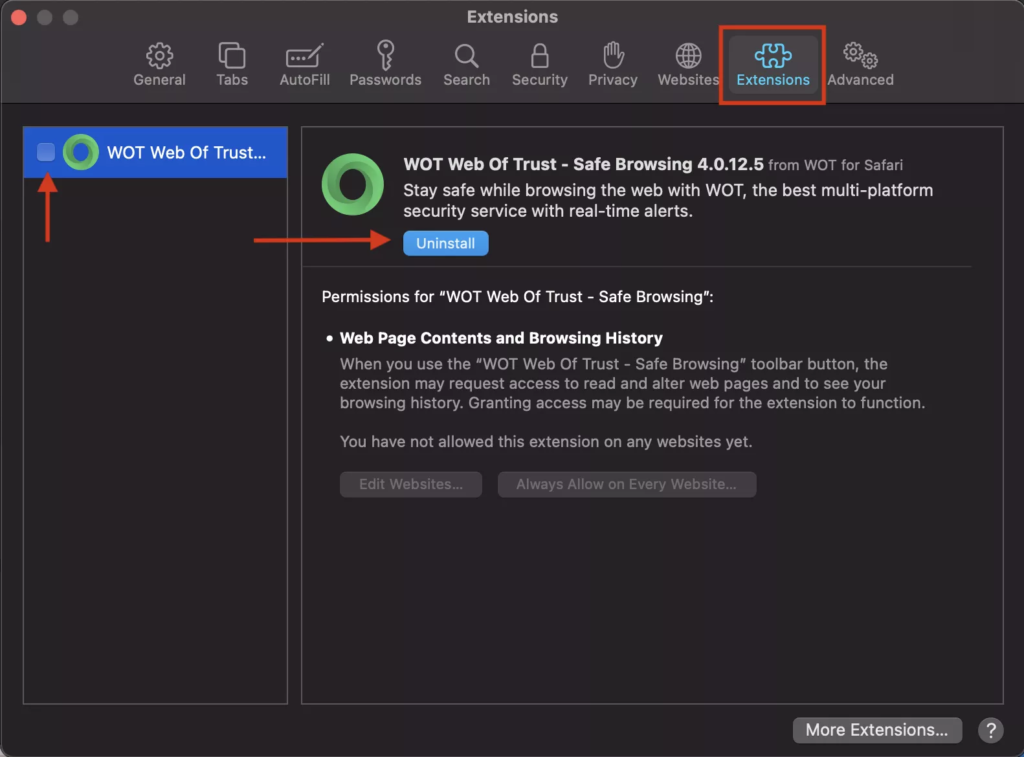
To check the homepage address and remove unwanted Safari extensions, follow the steps below:
- Open Safari and go to Preferences > General
- In the Homepage field, check the homepage address
- If the current address looks unfamiliar, change it to a preferred page
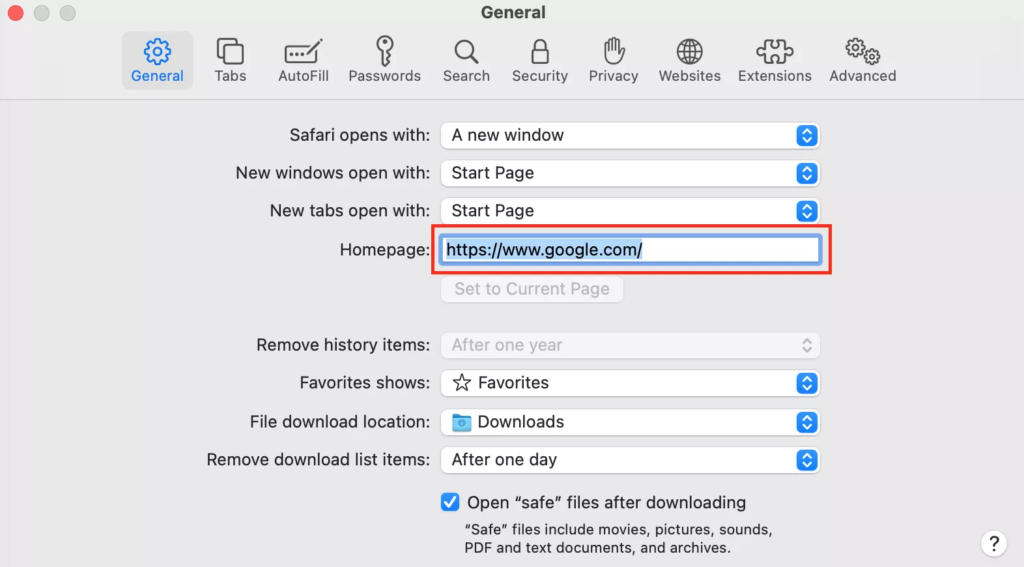
- Open the Extensions tab and check boxes next to suspicious extensions
- Click Uninstall
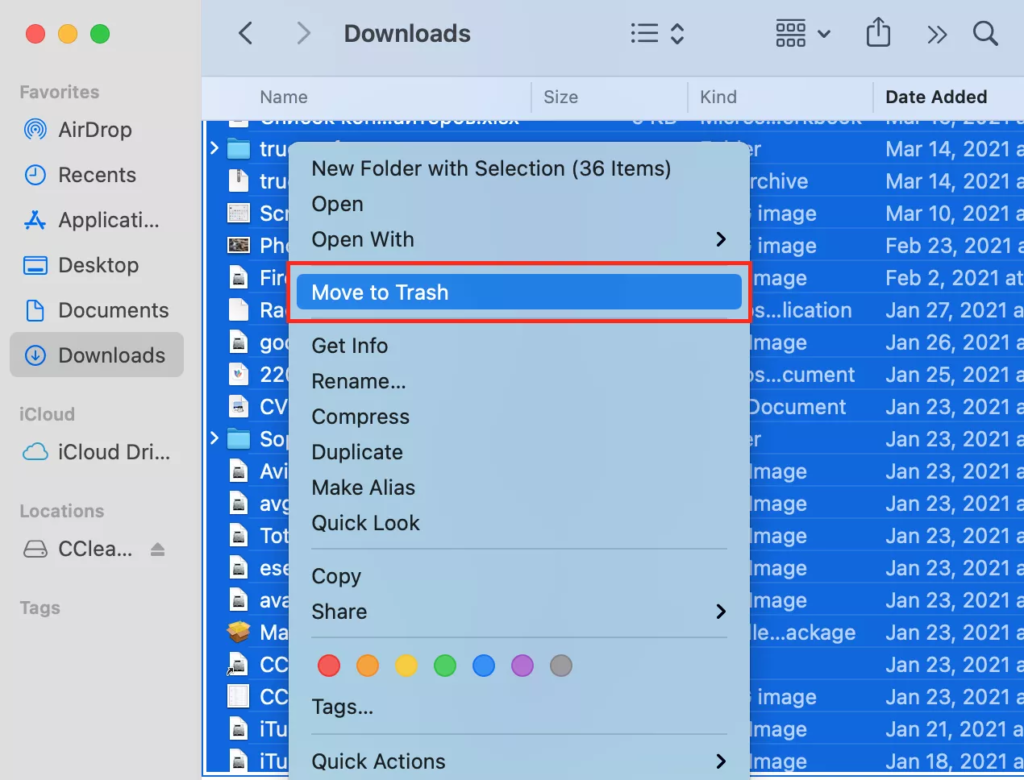
6. How to clear your downloads folder
There is a possibility that malware could be hidden among other downloaded files, so move the files you need to other folders. Then delete everything else, and empty the Trash.
Tips: Use Time Machine – This feature allows you to rollback your system, if you have been backing up regularly on your device. So restore your Mac from a backup that was made before any signs of the virus were present on your machine.
How to Create a Time Machine backup:
- Connect an external storage device, such as a USB or Thunderbolt drive. Learn more about backup disks that you can use with Time Machine.
- Open Time Machine preferences from the Time Machine menu
in the menu bar. Or choose Apple menu > System Preferences, then click Time Machine.
- Click Select Backup Disk.
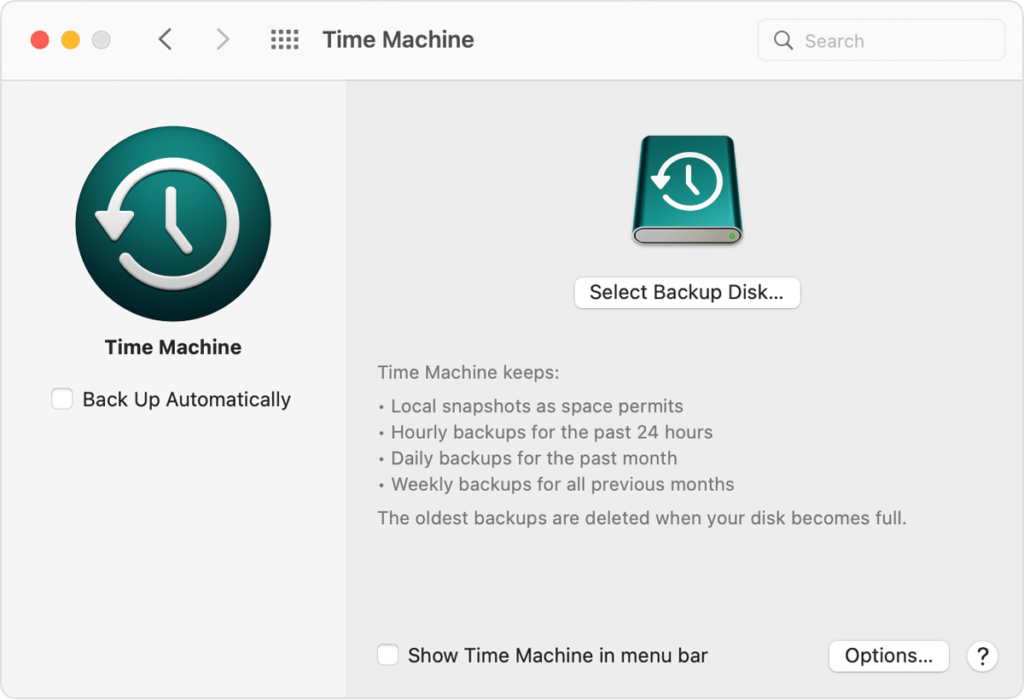
- Select the name of your disk, then click Use Disk. Time Machine immediately begins making periodic backups—automatically and without further action by you.
Disclaimer: Even if you follow all the steps shown here, still you might miss malware/virus and worse you might delete an important app. Always make sure to double check before deleting an app but if you have access to a trained professional, you can always consult them or you can ask us (support@tibcert.org).
0 Comments